
Microsoft Entra SSO Configuration Guide
1. Introduction
This guide is designed to help you set up Single Sign-On (SSO) for your organization’s applications using Microsoft Entra.
Important Note: Before you begin, make sure you have the necessary permissions. If you are not sure, please contact your company’s IT support or administrator.
2. Table of Contents
1. Understanding Key Terms
2. Getting Started
3. Step-by-Step SSO Setup
4. Testing and Confirmation
5. Troubleshooting & Support
6. Additional Resources
3. Understanding Key Terms
Microsoft Entra: Formerly known as Azure Active Directory, it is Microsoft’s online identity directory used to manage user access to resources. • SSO (Single Sign-On): A secure method that lets you access various apps with one set of credentials (username and password). • Application: Any online tool or service that your organization uses (e.g., email, collaboration tools).
4. Getting Started
Before you start configuring SSO, please ensure:
• You have been provided with administrator access to Microsoft Entra (or ask your IT team if necessary).
• Protocol from SSO will be SAML2
• Indicate the value to be used as the username. For the sake of SSO access, Cyber Guru would like to use the object ID of the user. That means, if you pre-load the user in our platform they must have objectID as the username
• Verify the presence in Microsoft User profile of mandatory fields : username, email, firstName, lastName
• Verify the access policy to the SSO application for the users. Using groups would be best.
• Provide a user for Cyberguru in Microsoft Entra for troubleshooting
5. Step-by-Step SSO Setup
5.1. Step 1:
Logging into Microsoft Entra
Go to the Microsoft Entra login page with admin role
5.2. Step 2: Navigating to the Enterprise Applications Section
Once logged in, look for a navigation panel (usually to the left).
Click on the option labeled “Enterprise Applications” or “Apps.”
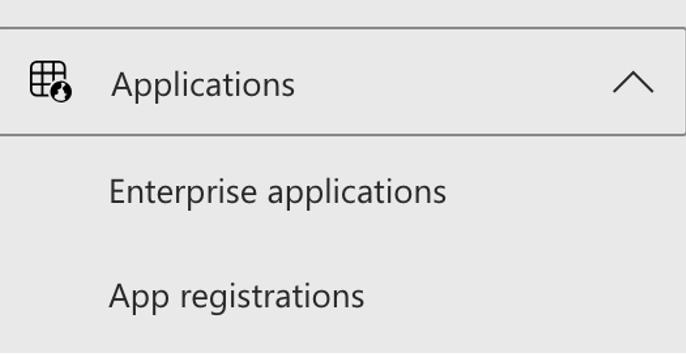
This section shows all applications available for SSO integration.
5.3. Step 3: Adding a New Application
At the top of the “Enterprise Applications” page, there is typically a button that says “New Application” or “Add Application.”
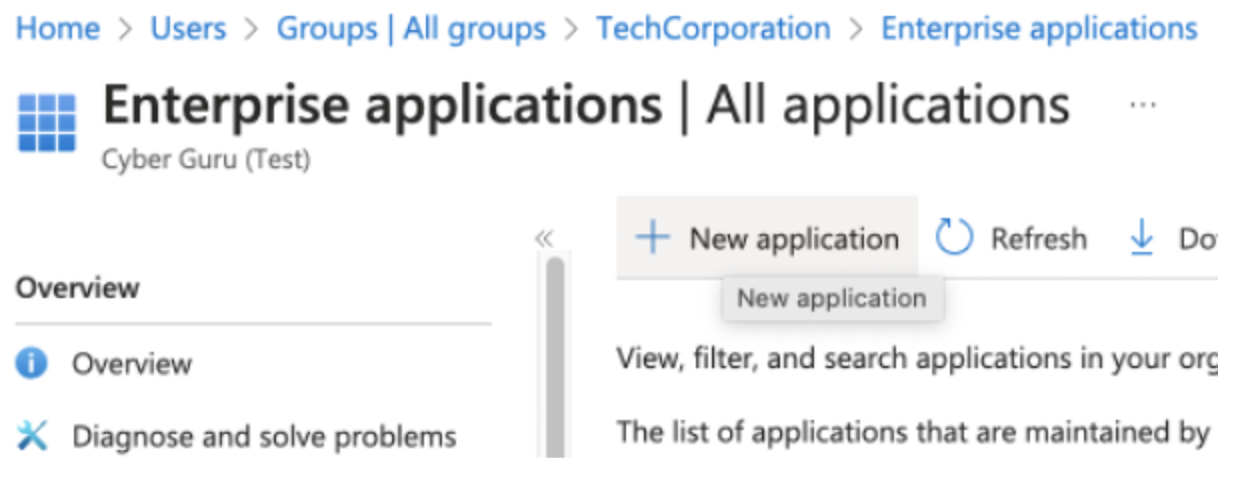
Click on that button.
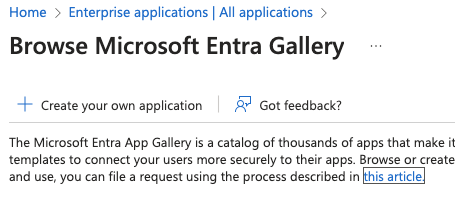
Click on “Create your own application”
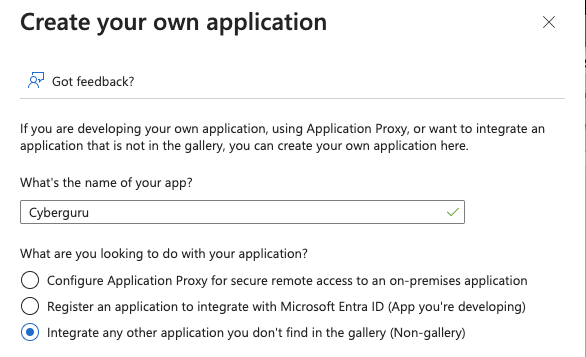
Be sure the radio button is selected on “Integrate any other application you don’t find in the gallery (Non-gallery)
insert a name for the application and click “Save”
5.4. Step 4: Configuring SSO for the Application
On the application’s overview page,
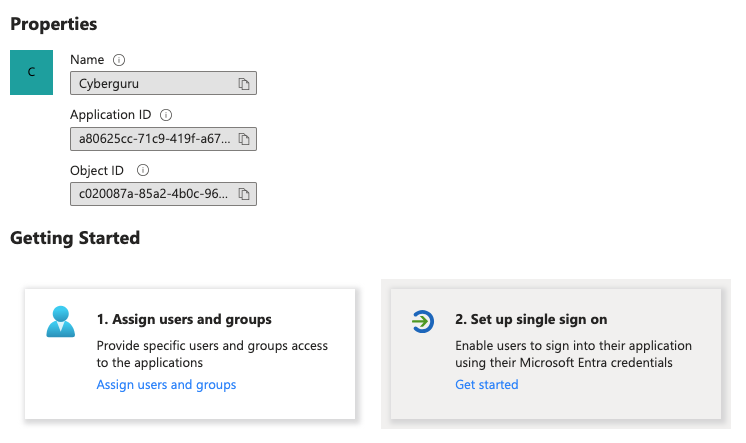
look for a button or link that says “Single Sign-On” or “Set up Single Sign-On.”
Click on this button. You will be taken to the SSO configuration page.
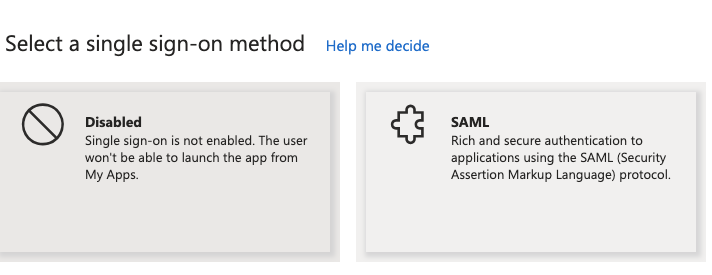
You might see different SSO methods (such as SAML, OpenID Connect, etc.). Click on “SAML”.
5.5. Step 5: send Idp Metadata to Cyber Guru
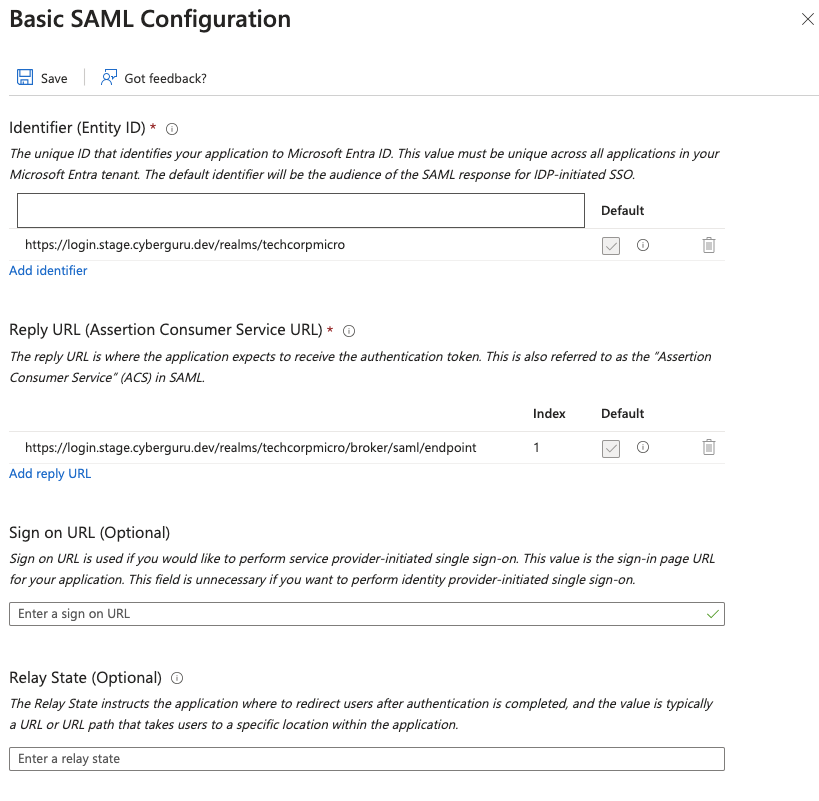
Locate the panel n.3 in the app page.
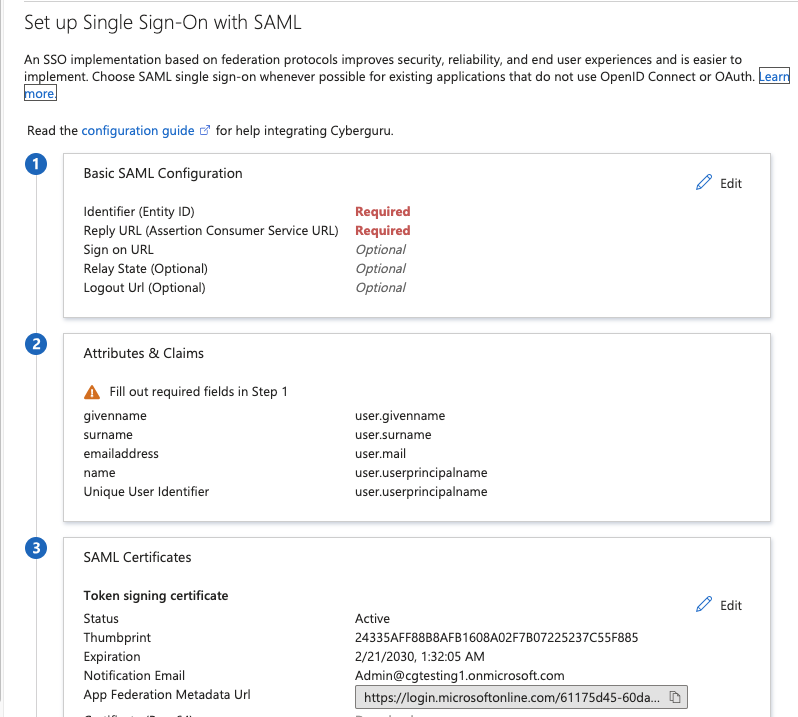
Copy the App FederationMetadata Url and send it to CSM Cyber Guru.
5.6. Step 6: Cyber Guru Configuration
Cyber Guru will complete the configuration on its side and send back the SP metadata Url.
N.B. Open the received SP metadata url in a browser and save as a xml file
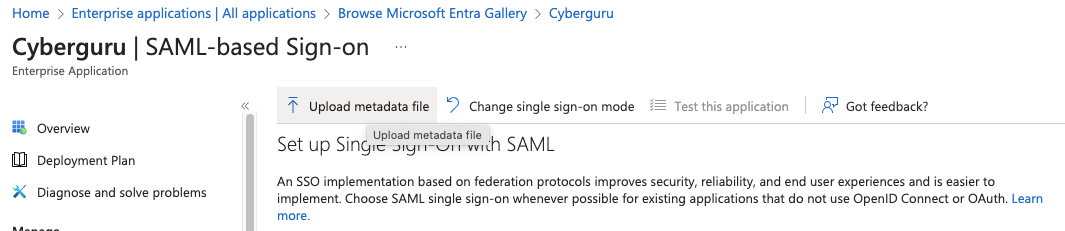
5.7. Step 7: upload SP metadata
Click on “Update metadata file”, on the upper left corner of the app page and
provide the SP metadata xml file saved in the previous step.
As soon as the file is uploaded, you get the metadata review page
click "Save"
5.8. Step 8: Adding Cyber Guru claims to SAML response
Cyber Guru claims the following mandatory attributes in the SAML response
• username
• firstName
• lastName
For a complete list of attributes Cyber Guru can recive in the response please refer to :
https://knowledgebase.cyberguru.eu/en/articles/1782850
As soon as the application is created, you’ll find the default claims as following
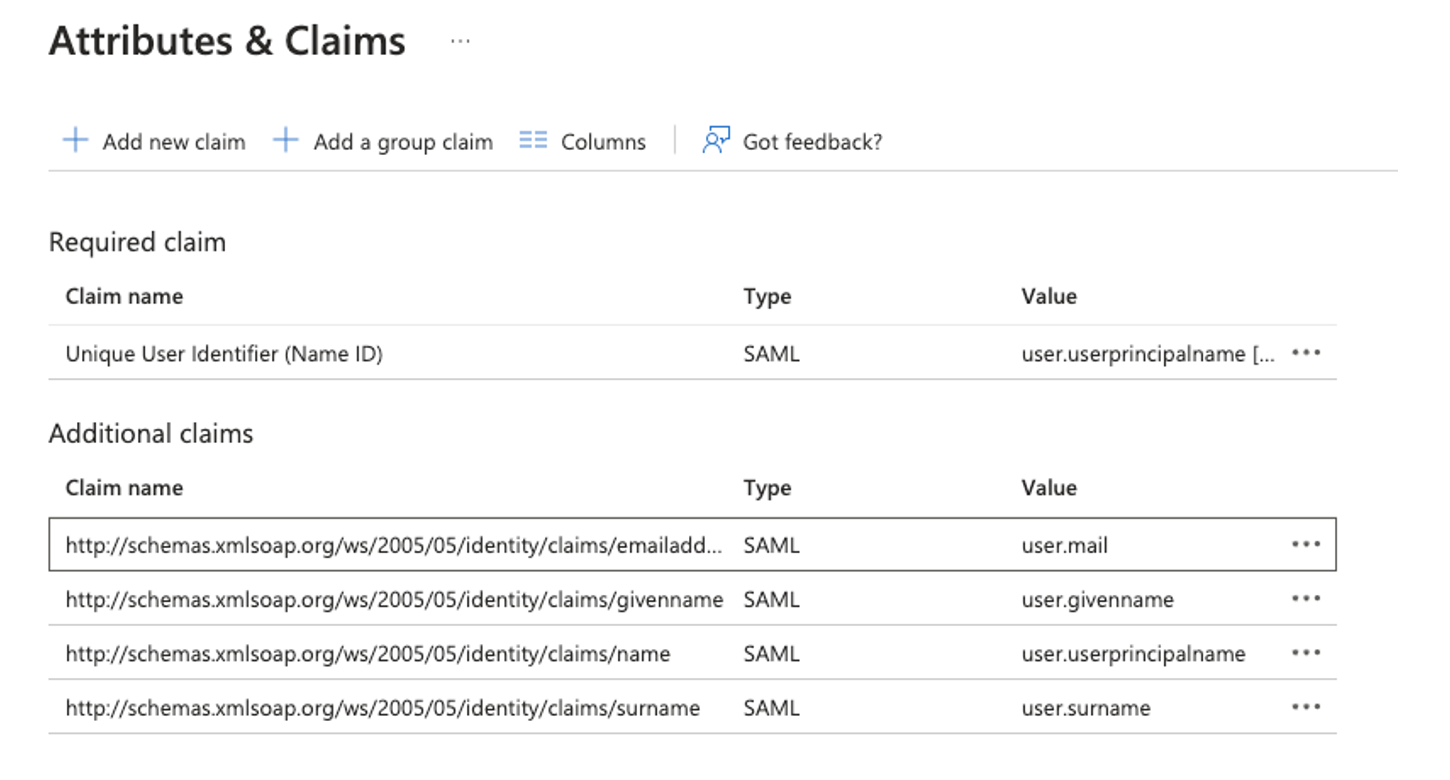
You can modify the existing Additional claims or remove all of them and create new ones. What follows is the detail for each mandatory attribute:
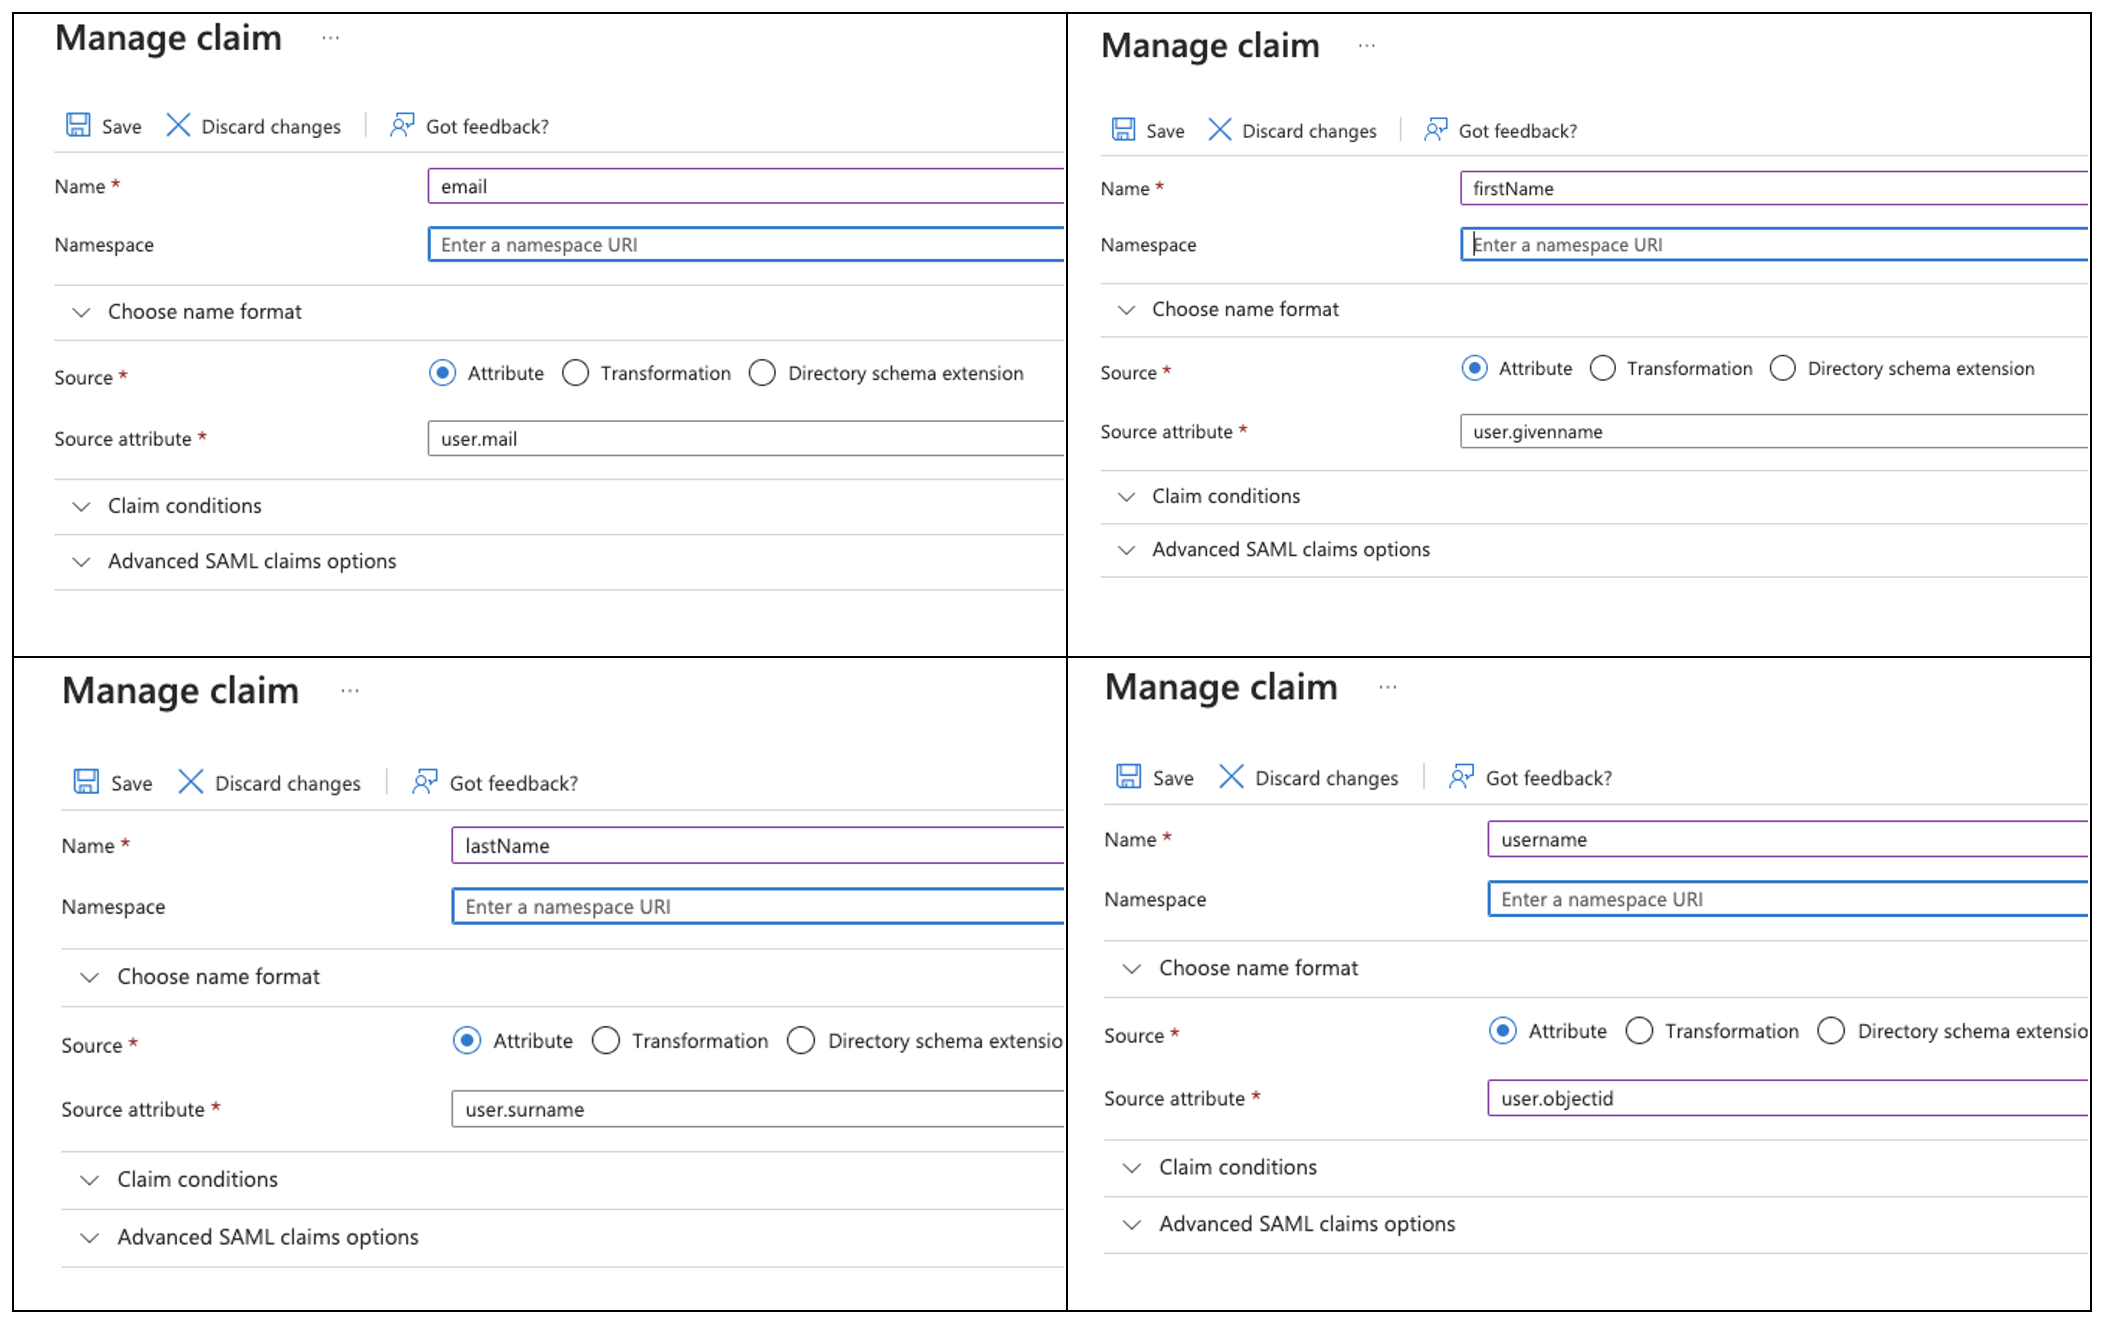
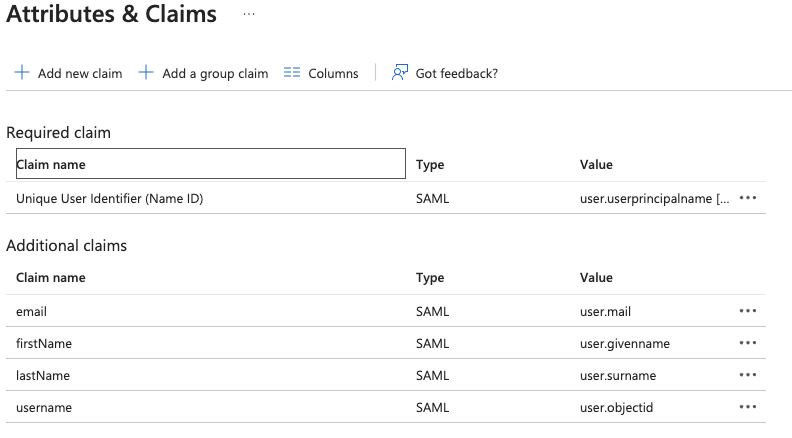
At the end of claims configuration you should see the following. Carefully review the mapping and pay attention at the attributes with case sensitive names (firstName , lastName)
5.9. Step 9 Reviewing the Configuration
Take a moment to review the information. If something doesn’t look right, you can go back and make adjustments.
Note: It’s a good idea to keep a paper note or digital copy of these settings for future reference.
6. Testing and Confirmation
Once the SSO configuration is complete, test that it works properly:
Authorise the user for the test in the application. The user must be already preloaded in Cyber Guru platform
Open a new browser window (or an incognito/private window).
Navigate to the application’s login URL
https://<client domain>.platform.cyberguru.eu
Click on the “Sign-In with SSO” button — your browser should redirect you to Microsoft Entra’s login page.(*)
Enter the login credentials.
Confirm that you are logged into the application without needing to enter extra credentials.
If everything is working correctly, you will see a success message or the application’s dashboard.
(*) This button can be eliminate by Cyber Guru so, as soon as you point your browser to https://<client domain>.platform.cyberguru.eu, the platform will redirect automatically the user to the Microsoft Login page.
7. Troubleshooting & Support
If you encounter issues during the configuration:
Double-check the information entered in each field.
Verify that the URLs and identifiers match those provided by your IT team or application provider.
Look for any error messages on the screen—these often include hints on what is wrong.
Use a SAML tracer in the browser to track down the values of the claims in the SAML response
If you are still having trouble, note down the error message and contact your IT support and/or Cyberguru helpdesk.
8. Additional Resources
Microsoft Entra Documentation:
Visit the official Microsoft website for detailed guides and FAQs:
https://learn.microsoft.com/en-us/entra/identity/enterprise-apps/add-application-portal-setup-sso
Contact IT Support: Reach out to your organization’s IT team for assistance with specific configurations.