Detailed Procedure - Microsoft Azure
Once the SSO configuration has been agreed upon with the client, a joint meeting will be scheduled where, together with CyberGuru, the configuration of the relevant platforms will take place.
The agenda for the meeting will be as follows:
Review of the information gathered during the kick-off
Review of the attributes (claims)
Configuration of Azure Active Directory
Configuration of CyberGuru
Testing
Below are the essential steps for the detailed configuration of the Identity Provider on Azure Active Directory, which should preferably be completed before the joint meeting, at least up to point f.
Client IdP Configuration on the Azure Active Directory Admin Console
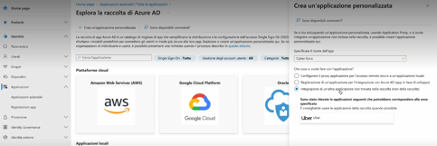
a. Access https://entra.microsoft.com/ and select “Applications” from the left menu -> “Enterprise Applications”.
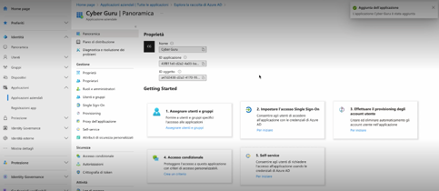
b. Create a new custom application named Cyber Guru, ensuring to select “Integrate any other application not found in the gallery (not in the gallery):
c. Select “2. Set up Single Sign-On”
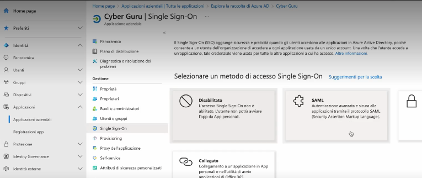
d. Select SAML
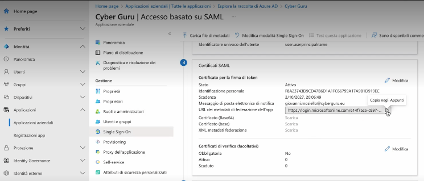
e. Scroll down to find the “3 SAML Certificates” box and copy the “App federation metadata URL”.
f. Communicate the IdP URL to CyberGuru
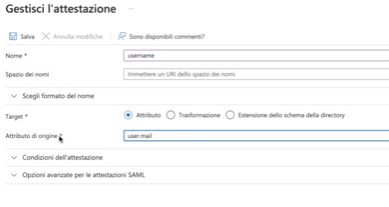
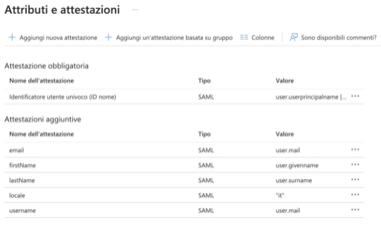
g. Select “Edit” in the “Attributes and Claims” box and enter all attributes as defined in the table in paragraph 4.1
Example of an attribute:
Enter the other attributes in the same way. In the end, the following configuration should result:
Completion of SAML Configuration in AZURE
This configuration is performed jointly to verify the Azure configuration and complete it with the metadata URL of the CyberGuru Service Provider
CyberGuru communicates the Service Provider URL to the client
Open the SP URL provided in point e with a browser and save it in a file with the XML extension.
Return to the “SAML Certificates” configuration, select “Upload metadata file” and provide the previously saved file.

